How to Make Money From Your Art: Concept to Product
- Twinimation Studios
Special Deal for Students
Enter your name and school email for a unique discount!
Do you love drawing unique characters or painting beautiful landscapes? Would you like to learn how you can make money from your artistic passions? Today, Twinimation Studios' Dria and Blake will be showing the full process of developing your original artworks into custom products for sales.
This specific blog will be character focused and we will be using our own Kreativity Krewe characters as an example. We'll go step-by-step over the process of designing out mascot characters and eventually launching exclusive products.
Step 1: Design Your Characters
Of course, the first step will be to design your characters. That means you must decide what type of character you'd like to draw. Will they be humans, animals, objects, or something else entirely? If you aren't 100% sure what you'd like for your characters to be, think of what type of market you want to appeal to with your products. If your ideal market will be kids, young child characters and/or cute animal characters (like stuffed animals) are usually best for relatability. A more mature audience however allows for a lot of freedom, since teen and adult interests can range from cutesy designs to more intentionally crude works (think FOX Animation). So hone in on your target audience first and foremost.
Once you've decided who you will be marketing to, now it's time to start sketching. I recommend starting with a logo for your brand, so you can knock out two birds with one stone. Not only will you have your characters ready for future projects, but you'll also get an icon for your work.
Our characters were created for the logo of our online art school. We never wanted to limit the market for our educational materials, so we geared our products to aspiring artists of all ages. As such, we wanted to create mascot characters that were cute for children, but with a nostalgic cartoon vibe that adults could also find interest in. Dria had been experimenting with characters based on both animals and food during college, so we decided to continue that them for our original characters.
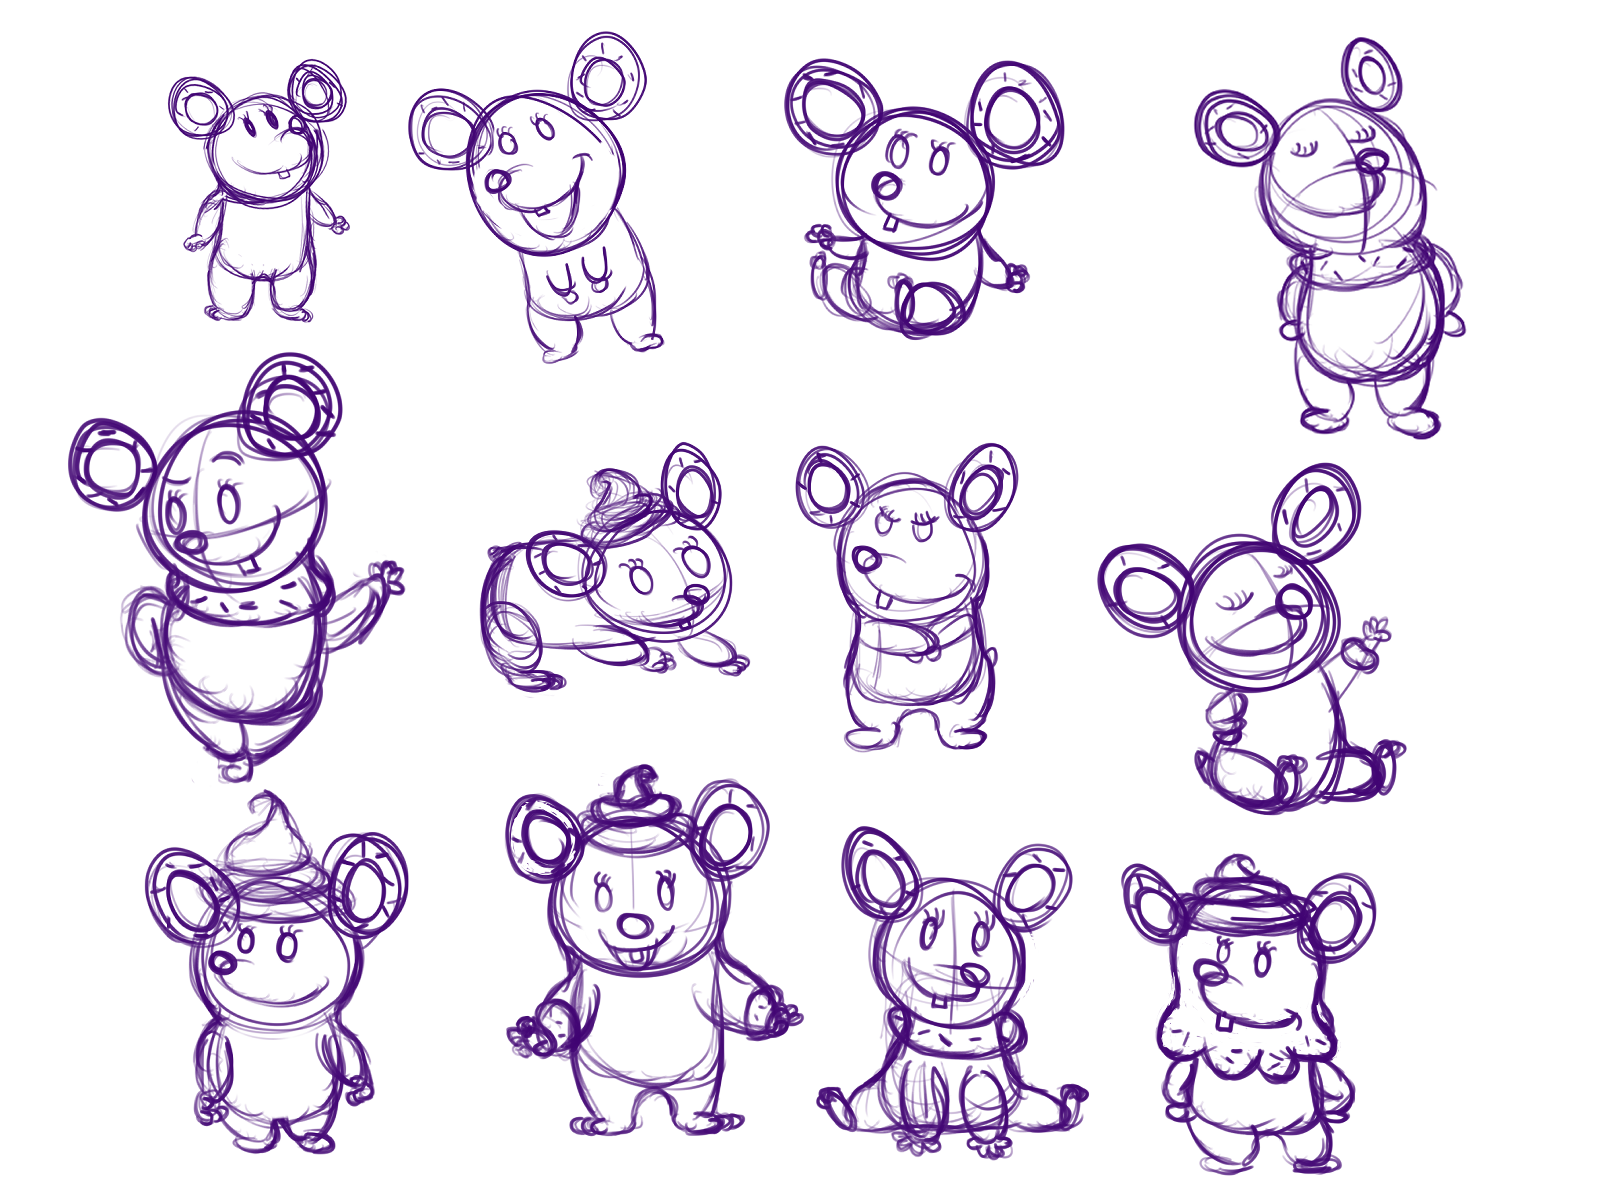
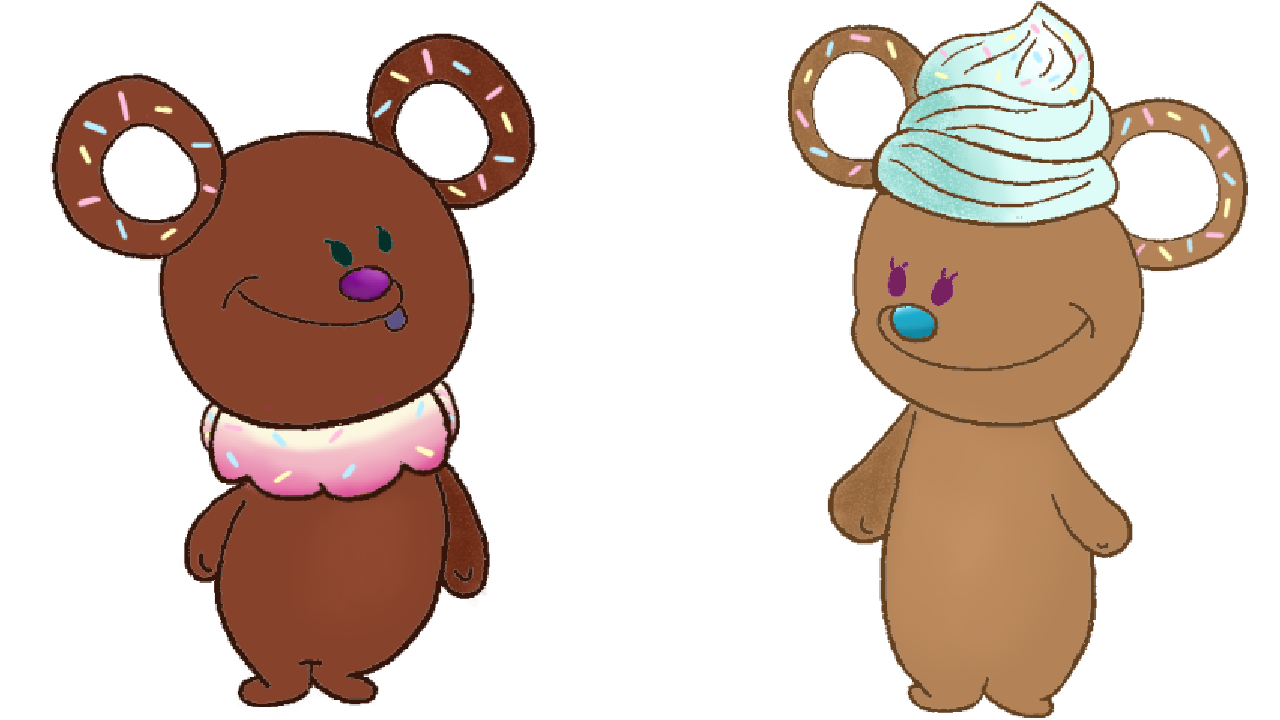
These are the first sketches of our characters. The original idea was to create one main character, similar to Mickey Mouse representing Disney or Bugs Bunny symbolizing Looney Tunes. Over time, we liked a few aspects such as the frosted doughnut collar around the mouse's neck, the doughnut ears, and whipped/ice cream on the head. We tried incorporating all of these ideas, but the character was becoming too clustered. Additionally, since we were planning on running our business as a partnership, we decided to split the character into two and use a few design elements for each mouse.
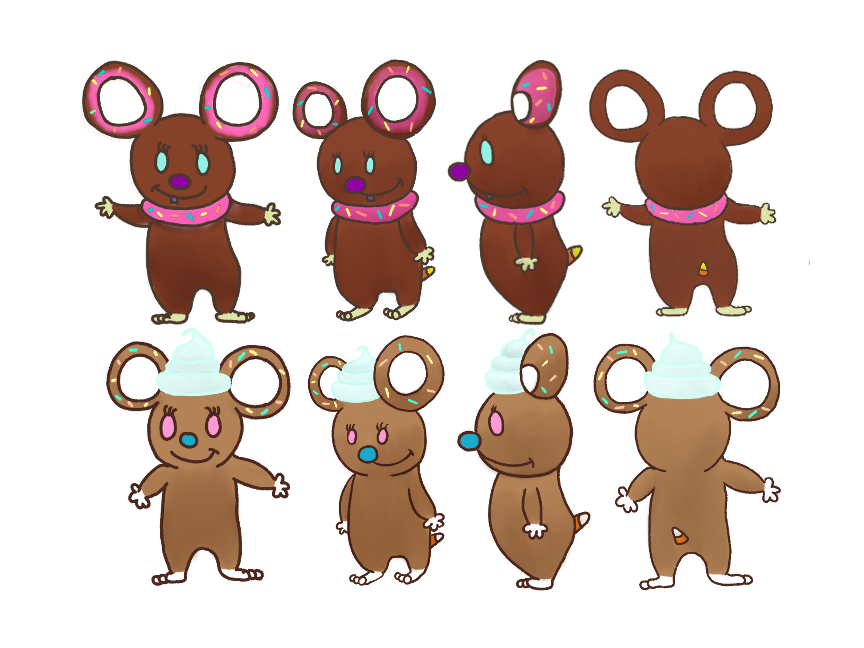
Above are the revised versions of the mice characters, then named after characters from Blake's senior film in college; Maho and Magi. These drawings are still pretty rough, but they were good enough to act our mascots for the time. The majority of these design elements will remain for the characters, but some will be tweaked over time. The next step was to actually create the logo.
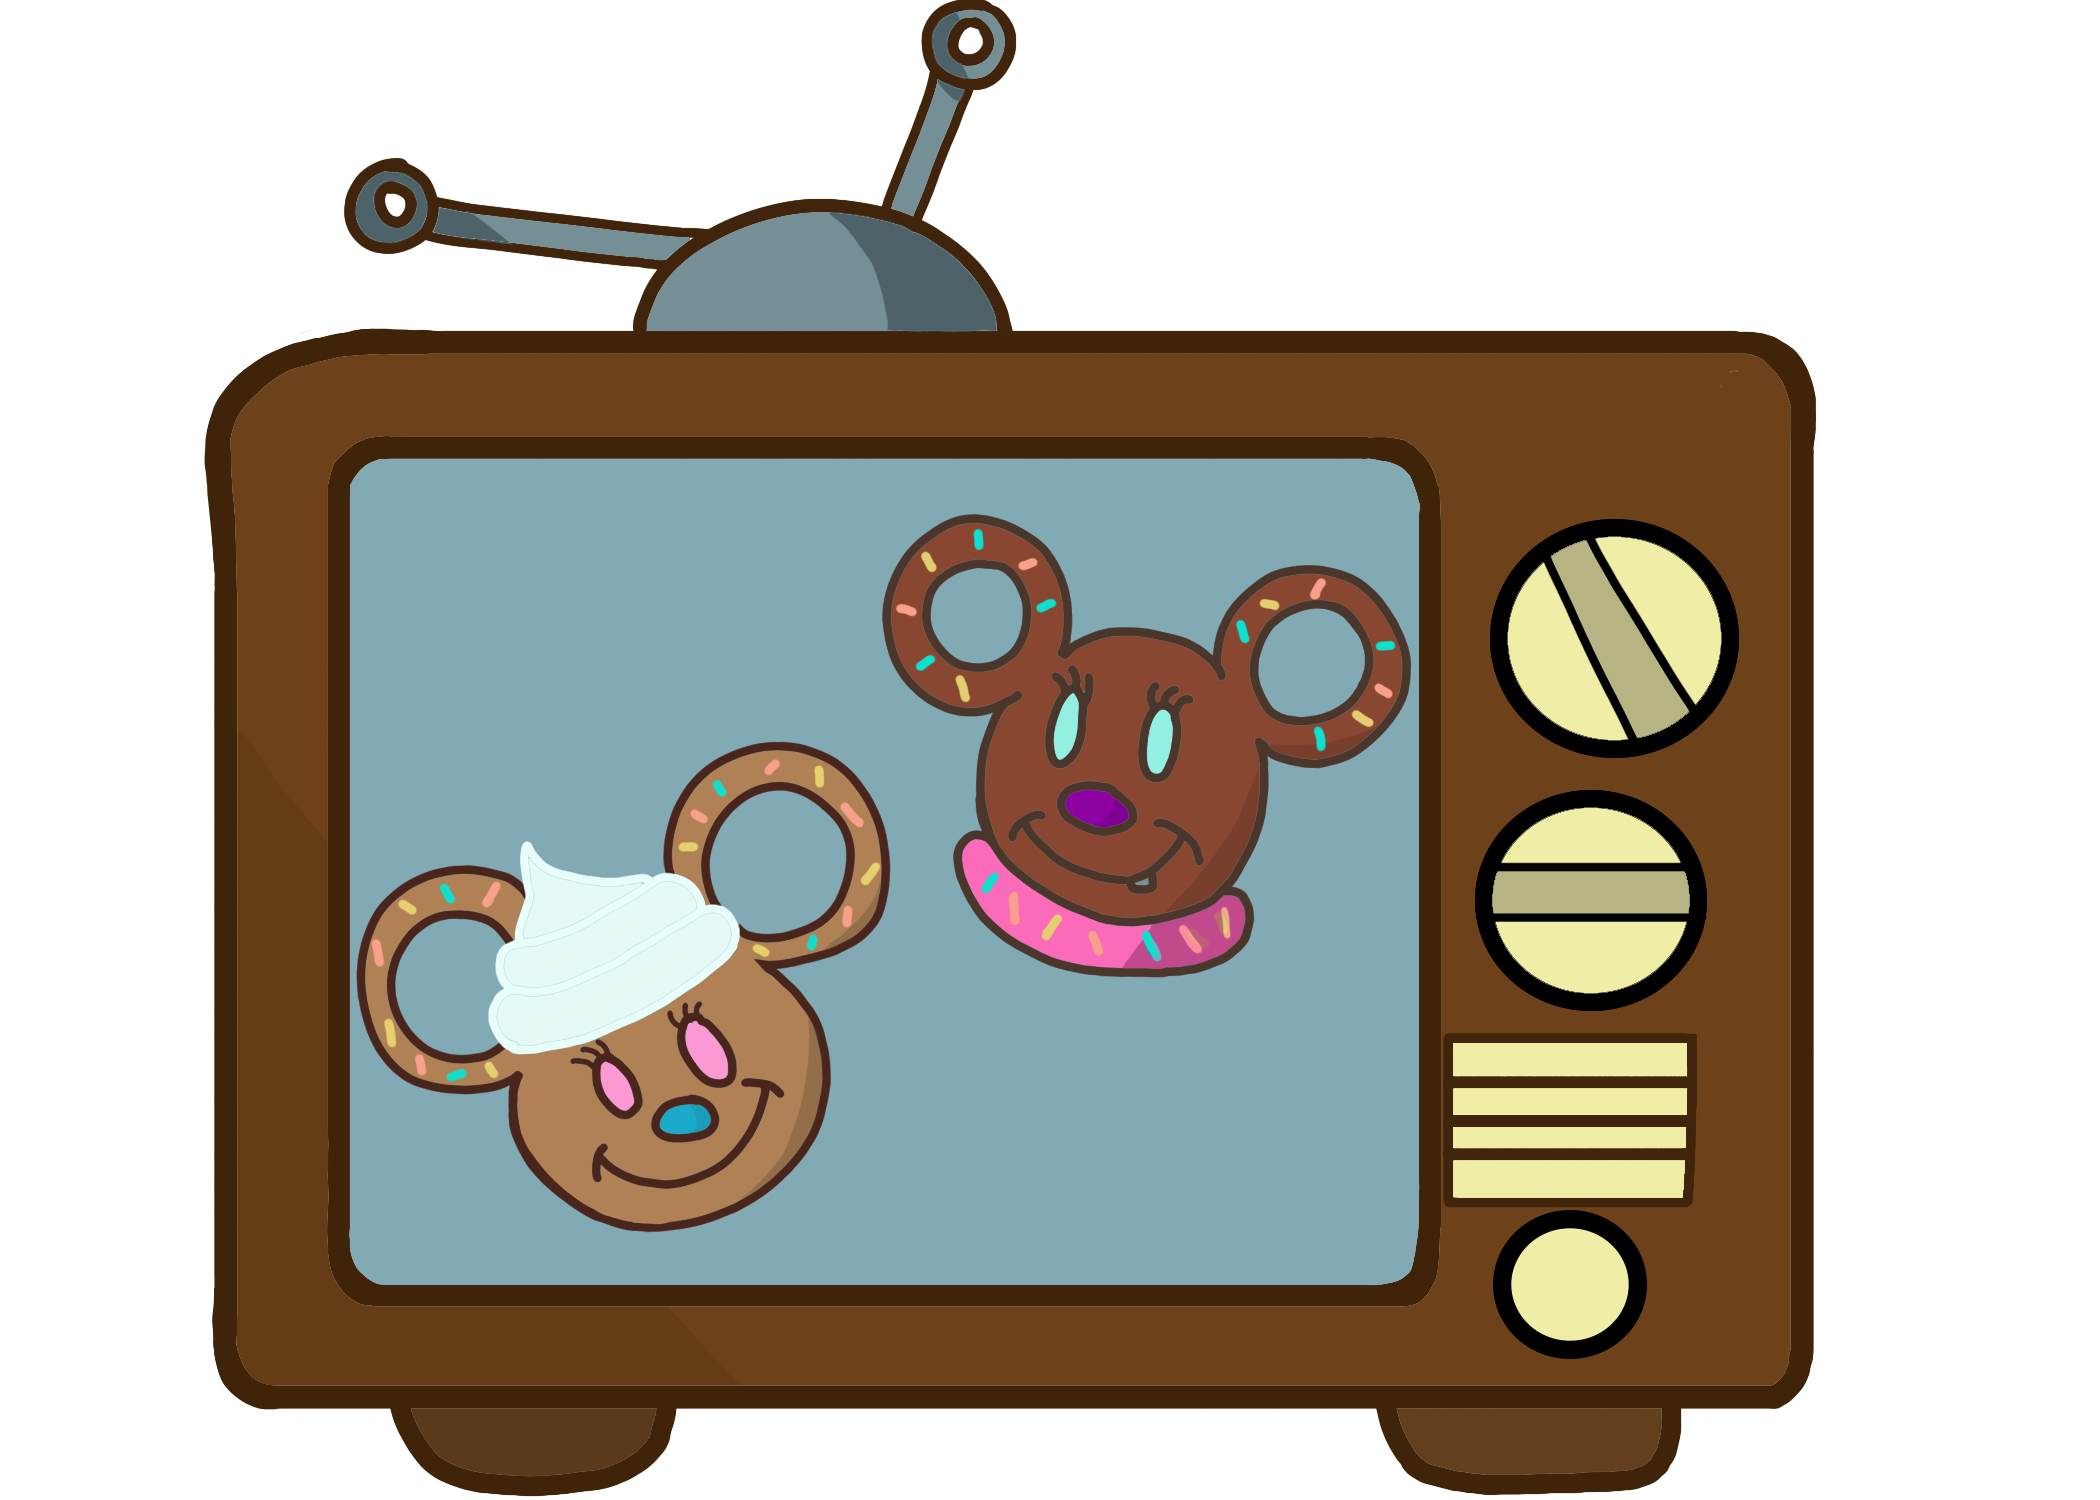
Here is the first version of the logo (before the addition of our business name). As you can see, there are only a few differences from this design compared to the originals. The darker chocolate mouse lacks the pink frosting on her ears but everything else remains the same. We wanted to also draw them in a style similar to classic cartoons of the 50s-90s to match our main courses at the time. Since our initial focus was specifically on our animation and film classes, we decided to place the characters faces in a classic television for the logo. This is the result.
For more information on designing characters, I recommend the book Creating Characters with Personality by Tom Bancroft.
Step 2: Create a Soft Launch
This might sound strange, but the next step will be to launch a product. So soon? Yes. Ideally you want to gauge the demand for your characters and products early. But don't worry, we recommend starting small to manage your production budget and to see what people will be interested in.
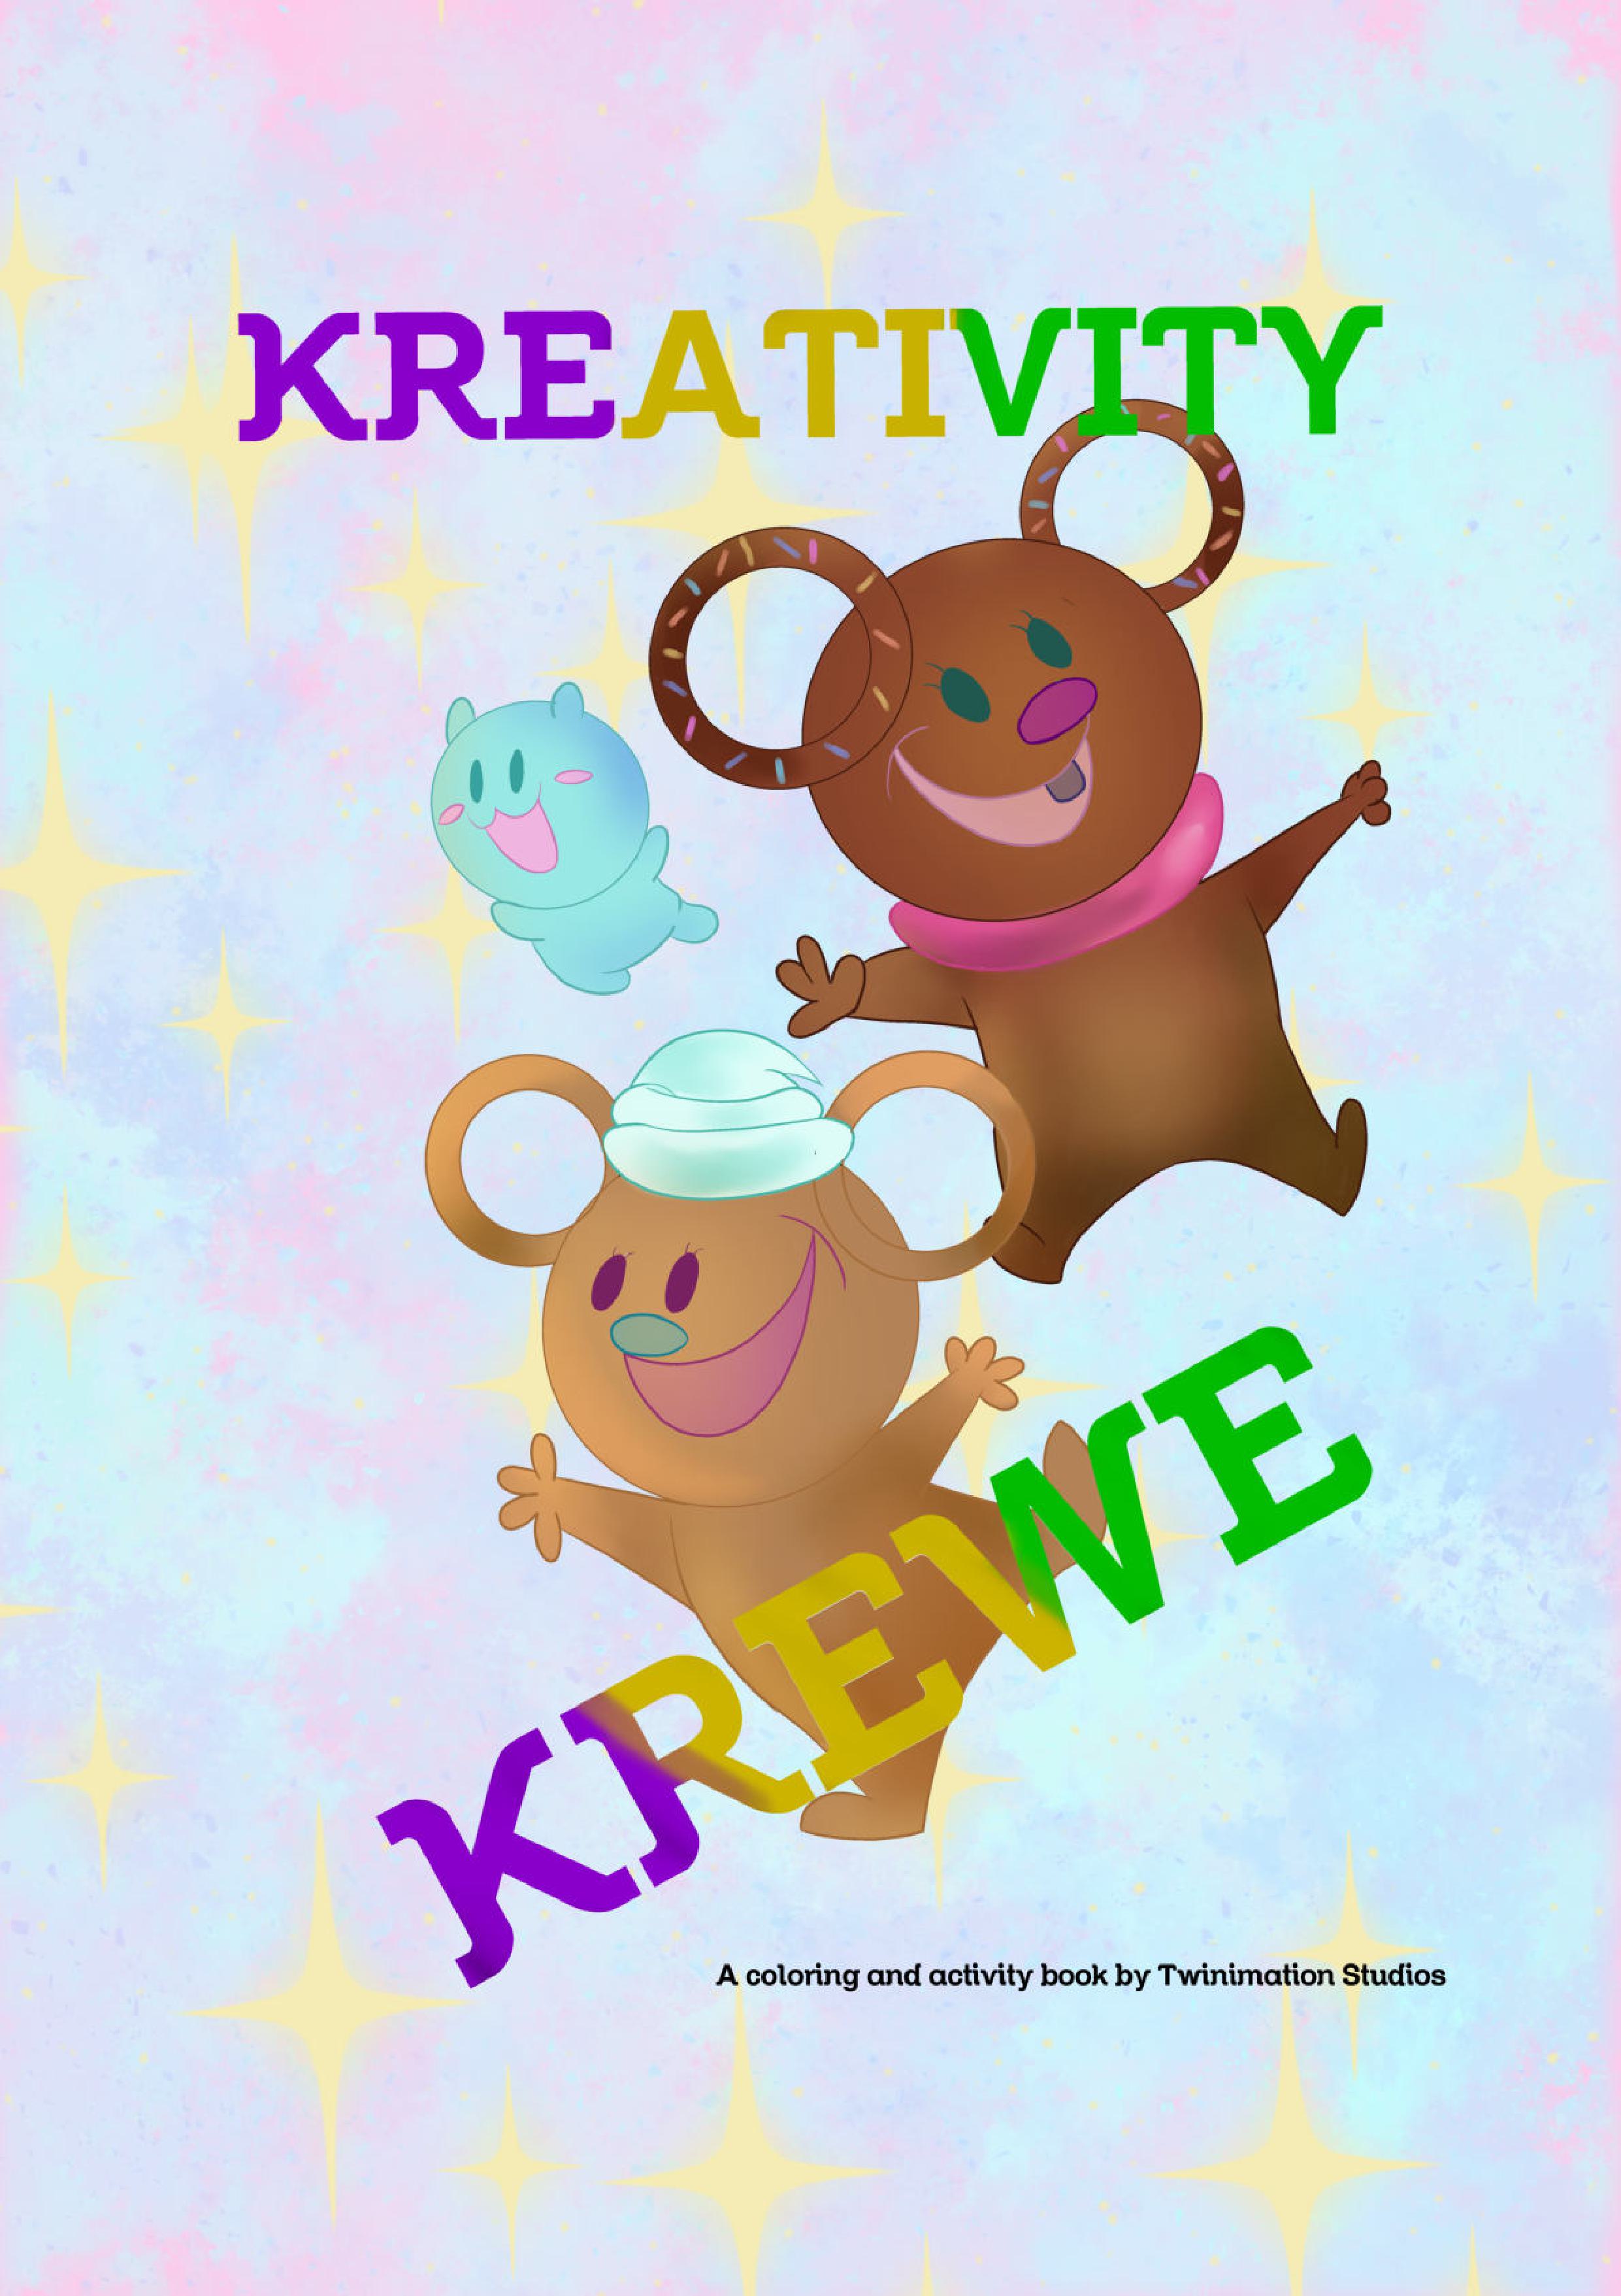
We actually wound up with a larger project than we'd recommend to others, with a full coloring and activity book, which we illustrated entirely by hand! Of course, since it was a product aimed mainly at younger children, we used our mouse characters for the cover.
You can probably already notice that their designs have changed once again! The mice now have full solid colored bodies, ditching the pale hands and feet in their original model sheet. They also now lack their 3-toed feet. All of this was for simplicity when drawing these characters throughout the book, not to mention to make them easier for kids using the book to color. The caramel mouse Tan also lacks the sprinkles on her ears on this cover image, though they are absent from both throughout the book so the children can manually color them as they please.
The most obvious change, however, is the addition of a 3rd character. The small green character was originally added for a one off joke within a comic inside the book. However, since we enjoyed his cuteness, and felt we needed a major male character, he was made into a mascot as well.
We started out by selling the books at church events, local book signings, and by word of mouth to family and friends. They were very successful and we sold out within a few months. Most of our customers enjoyed the books so much that they were eager to know when future books would be released. Since the books were primarily educational, many parents viewed them as being a beneficial tool for their children. We wound up releasing a second book the following year. Here, the mice finally got their official names, Chan and Tan!

For your first launch, we definitely recommend starting small, especially if you are a beginner. Since we'd worked on short films before, illustrating a book wasn't too much of a task for us. But for those starting out, it's ideal to aim for a lesser workload. You can sell keychains, posters, acrylic standees, enamel pins, and a wide assortment of other small products with your characters. You can also opt for digital products if ordering custom items is still out of your budget. Digital prints, desktop/phone wallpapers, and more are suitable options as well. Choose whichever products best fits your price point and is in demand from your target audience.
If your market is teens and young adults, collectable items like standees or decorative products such as keychains would probably sell well. Younger kids who enjoy decorating their rooms might enjoy posters. To be safe, order a small amount of your product (ideally 50 or less) so that you don't wind up creating more items than you have a market for.
Step 3: Review and Refine
After your launch, you should take the time to review which markets you excelled in and which were not as successful. For the audiences where you didn't see as much traction, decide if perhaps redesigning your characters could be of benefit.
This is where your social media can shine if you have one. Put your designs out there and ask for feedback. Ask what is working well, and what can be improved.
It's only natural that your character design skills will evolve and improve over time. As such, don't be afraid to redesign your characters as you see fit. For example, Chan and Tan's were originally intended to be simple and flat, very similar to classic UPA era cartoons. Those designs are fine, however Dria wanted to upgrade them with a slightly more refined looked with some more details.
Below is the first pass of Chan and Tan's upgraded designs. Chan's simple pink frosting collar and Tan's ice cream hair now have clearer 3-dimmensional form. It's a nice start, but it will continue to be improved. Both now have simpler mitten-like hands with only a noticeable thumb. Also, the sprinkles have not only returned for their ears, but they are now present on both the collar and ice cream. Probably the most notable change is that their eyes, which had continued to increase in size over time, are now very tiny!
This will not be the final upgraded design, but it is a great starting off point. They have more depth and a cuter appeal, which was the main goal. Again, you are free to continue refining and updating your characters and upgrading them as you work.
Step 4: Expand to More Products
The redesigns don't stop there! At the same time Dria was giving Tan and Chan a quick spruce up, Blake was making even bigger changes. While the activity books were a big hit, we wanted to expand further than just having only books as a physical product. In particular, we wanted to create a new product outside of the educational materials. Additionally, since the books had been primarily geared toward younger audiences, we wanted something older individuals could enjoy as well.
In order to accomplish that, Blake decided that the next step was to make the characters more appealing for a much wider public. With anime being extremely popular worldwide, and a huge passion for Blake, we thought to transform the mice characters into anime styled characters!
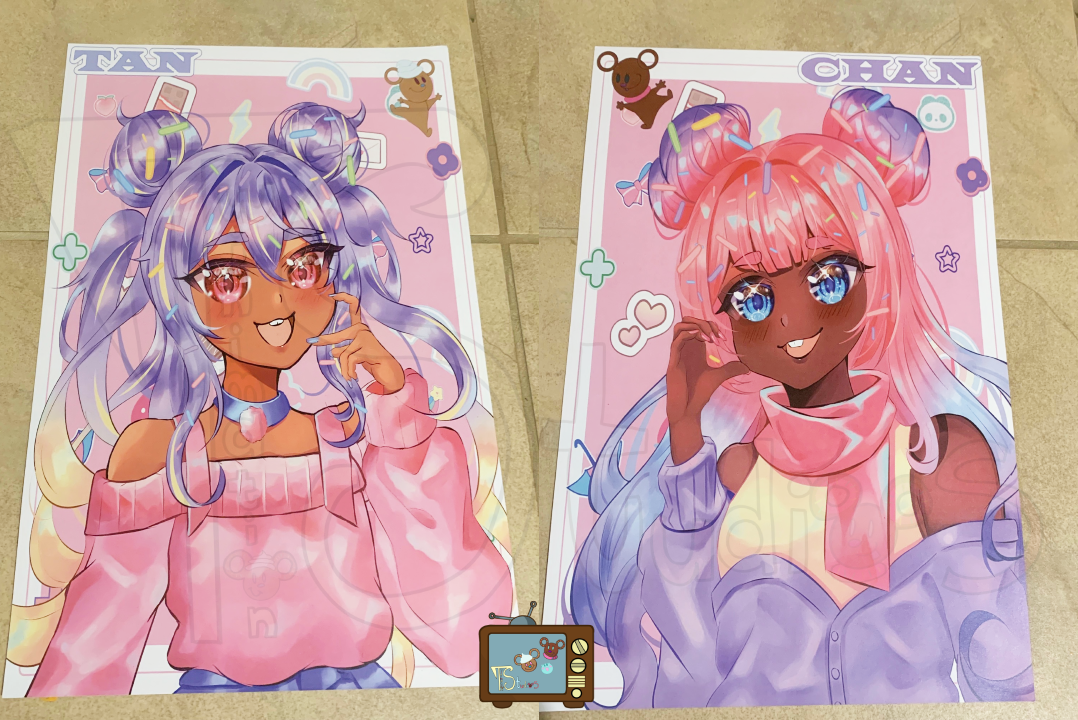
Translating the characters from cartoony mice into full fledged anime girls was an impressive task, but Blake succeeded in all aspects!
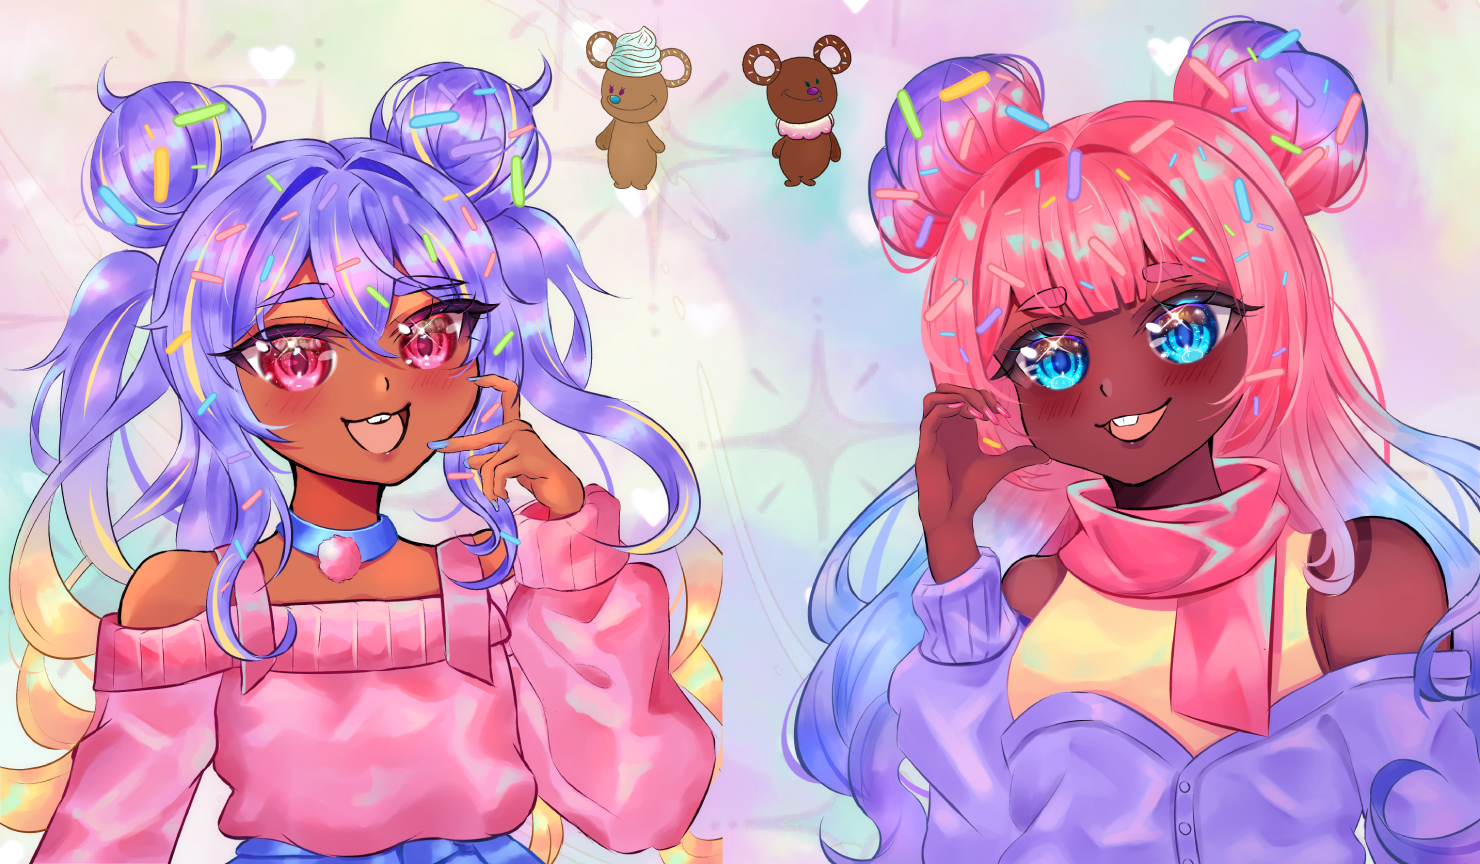
Blake translated several aspects of the characters flawlessly. Both of their sprinkle covered doughnut ears are now cute hair buns with their own style. Tan's wispy buns represent her mouse counterpart's whipped cream hair perfectly. Meanwhile, Chan's frosting collar is represented by a bright pink scarf. Each of them also has noticeable rodent-like teeth, as a homage to their animal forms.
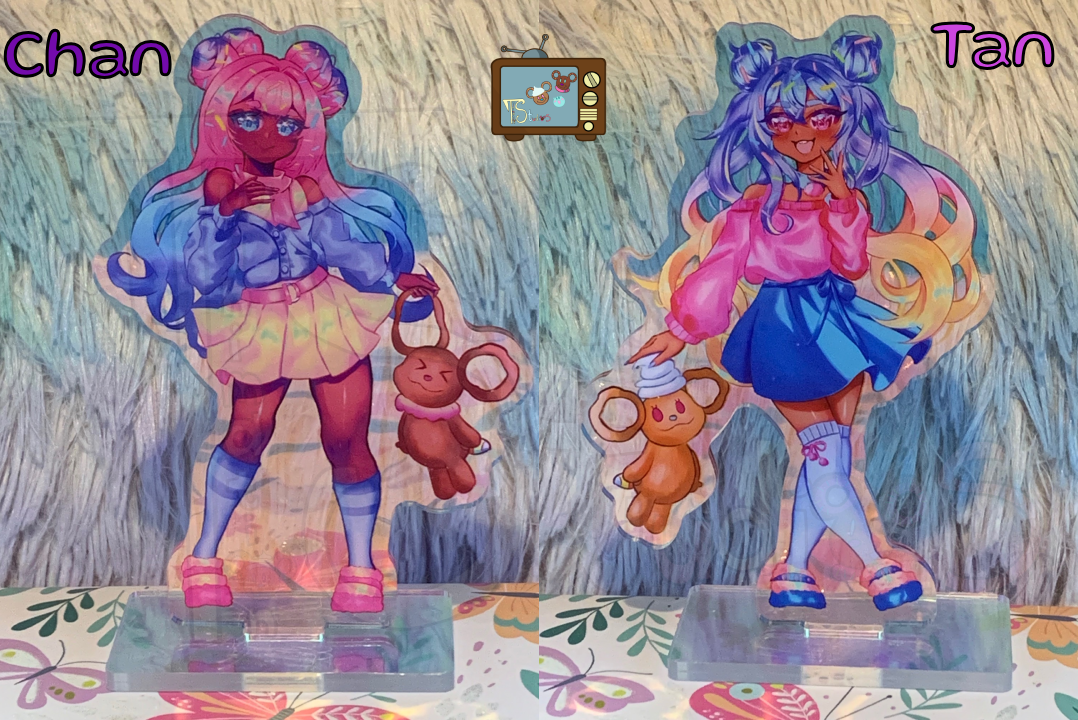
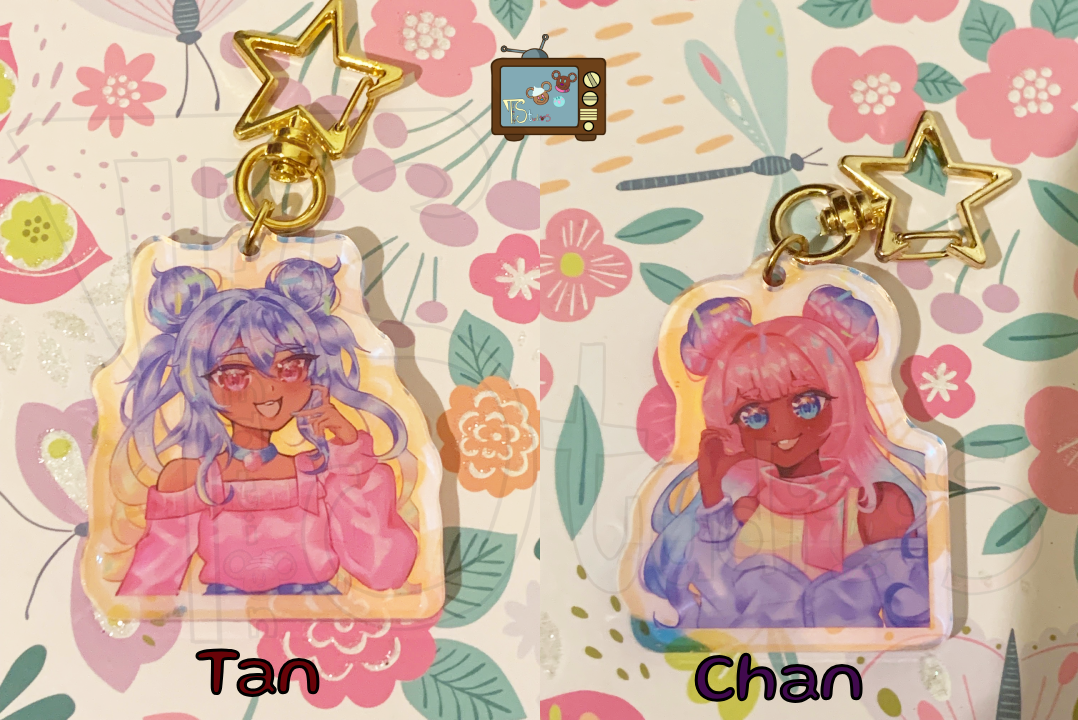
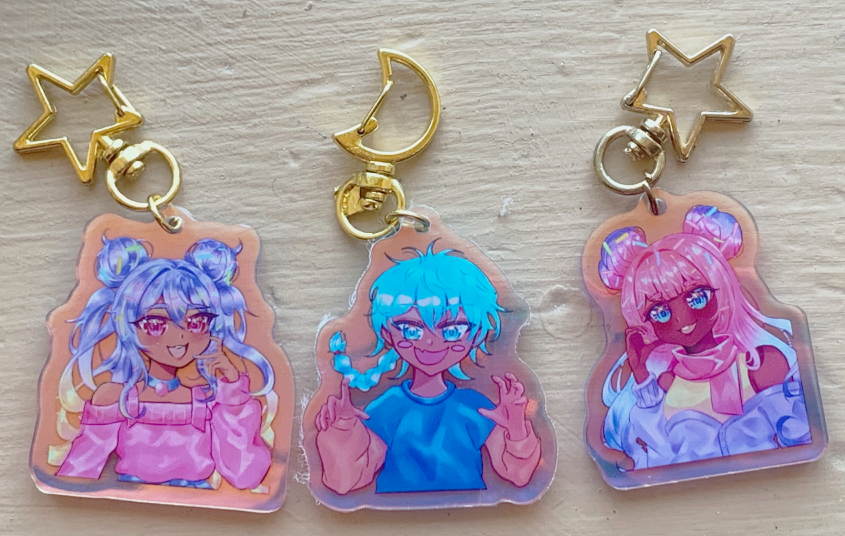
Overall, we could not be happier with the evolution of the deigns. And now that we had the new Tan and Chan, it was time to decide what we were going to do with them. Eventually we landed on a few different ideas. We felt that they were perfect for display items, including posters, keychains, standees. We went ahead and ordered them to be ready for an upcoming art market.
Step 5: Build Your Brand
You've now created your own characters and have a decent array of products to sell. If your mission is to do this for the long term, your final step should be to build your brand. I imagine you'll want to sell to more than just locals at pop up markets, which means it's time to enter the world of online marketing. At this point, you will need to decide upon a business name and determine how you will be selling your merch.
The great thing about working as an artist is that we have a wide array of methods to sell our products. You can join a host website, such as Etsy or Amazon. Create your own personal shop and sell your merchandise online, usually at no cost to you. While this is fine for those just starting out, if you can afford it over time, it's best to have your own website! When you sell your products through a host like Etsy, you have to abide by their rules and policies, and typically you must give up some of your revenue to the platform. But on your own website, you can set your own prices and your paycheck is yours. Of course, you will need to pay for that site, but the benefits of deciding what you can sell is a superior benefit.
If you want to start somewhere in between, try joining a free platform like Ko-fi or Gumroad where there is no cost join, but you can price your digital or physical products as you wish with only a small transaction fee for your sales. If your sole specialty is physical products, you can also join a print on demand website, where all you need to do is supply your design and the company will handle orders and delivery. These websites also typically sell a wide variety of products, such as T-shirts, mugs, bags, notebooks, small tote bags, etc.
If you find success here, you can invest in your own website. Wix, Squarespace, and Shopify are all perfectly suitable options where you can design your site as you please and sell whatever product you wish.
Step 6: Grow Your Brand
From this point onward, the only way to continue is upward! Keep expanding your merchandise until you feel everything is complete. You're also free to add more characters if you wish. In fact, we recommend having as many characters as possible in your lineup. The more original characters you've made, the wider range of products you can produce and sell in the future!
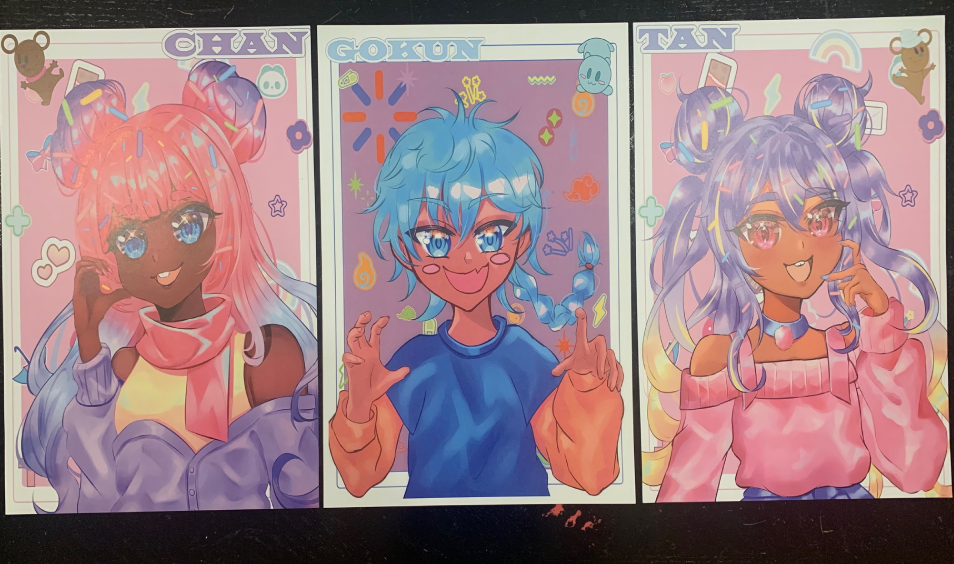
I'm sure you've been wondering about our male character Gokun. He was also added to the product line! It should be no secret that the Chan and Tan merchandise was great with young girls, but not the first pick for young boys. As such, we needed something for that market. Check out his posters and keychains!
And we don't plan to stop with our current product lineup. We have so many plans for future merchandise! We aim to expand the Kreativity Krewe brand for many years to come. And we'll be sure to keep everyone updated on our progress to follow along! The arts market isn't slowing down any time soon, so if you'd like to be a apart of it, make sure to keep following our tips!
If you'd like to learn more about how to build an original brand, make sure to check out our e-book, which can be found below. And of course, if you need to improve your art skills before moving on this path, check out the numerous art tutorials here at Twinimation Studios!